Uploading Files
The Uploads section of drafts allows users to:
- Add files
- Delete files
- View files
- Change/update descriptions about file
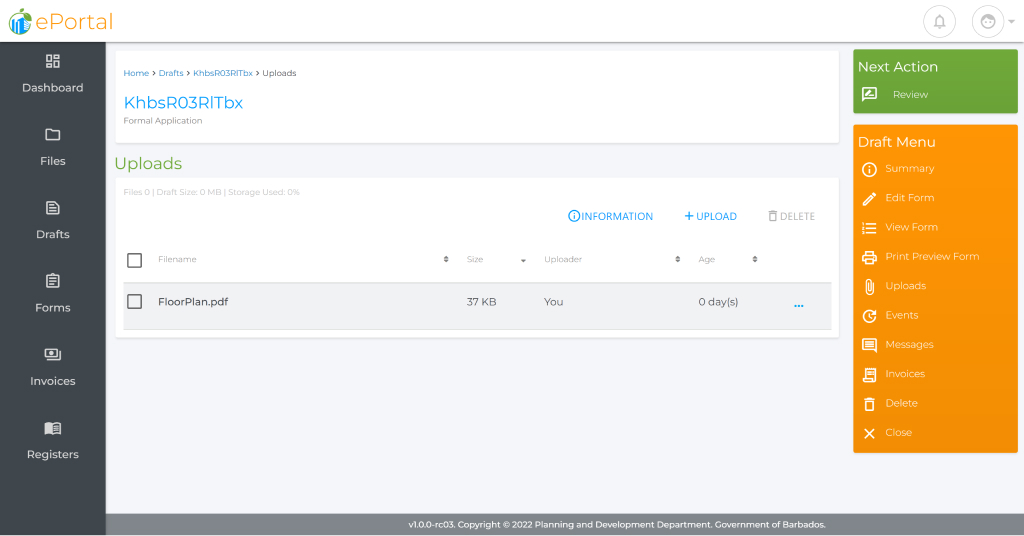
The section allows users to view the size of the document, the user that uploaded (Used for companies) and the age of the upload as individual uploads are given their own expiration date.
info
The Planning and Development Department reserves the right to request a physical copy of all documentation supplied within.
Adding a File
Adding a file is a very easy process within the ePortal, to perform this take the below steps.
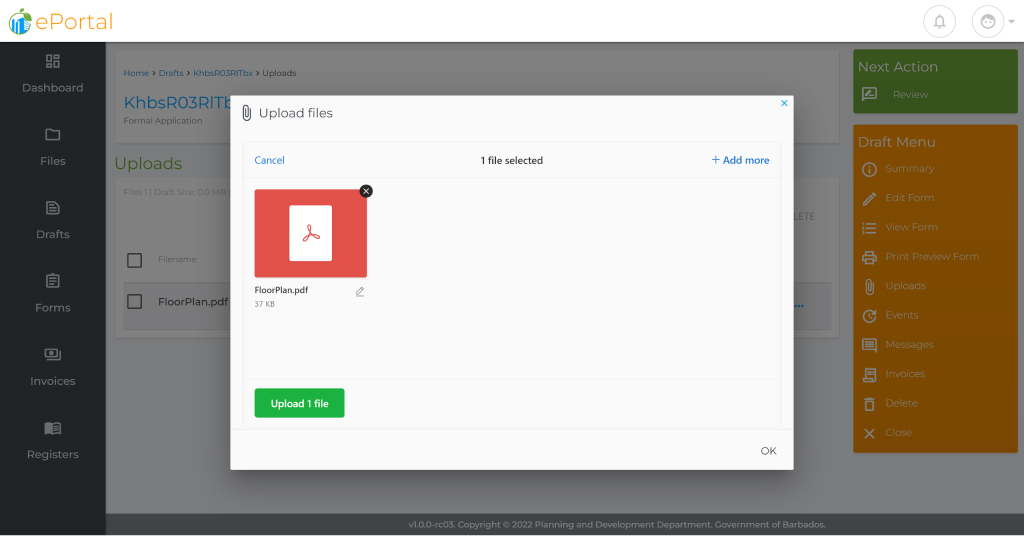
- Click on the the upload button.
- To identify the file to be uploaded: a. Drag the file onto the Window that appears, or b. Browse for the desired file and click ok.
- Once the file has been selected (identified), click the Upload 1 file button.
- You may repeat steps 2 & 3 as necessary and when ready click the window's OK.
tip
Multiple Files: You can either drag multiple files or add multiple files via the + Add more button
info
File Information
- Files cannot be larger than 5MB
- File names should not contain exotic characters:- [`!@#$%^&*()+={};':"|,»«\/?~]
- File names should be labelled to the naming convention of type-of-plan.pdf. e.g.: certificate.pdf, front_elevation.pdf,location-plan.pdf
- File names extensions should be lowercase:- .pdf and NOT .PDF
- Files will remain on the server for no less than 30 days. After 30 days, files will be removed automatically.
Deleting a File
The ePortal provides two methods to delete a file.
Method 1
- Select the file to be deleted, by clicking in the checkbox next to its name
- Click on the highlighted red Delete button.
- Confirm the deletion in the following prompt.
tip
Delete Multiple Files: To delete multiple files, repeat step 2 above for each file to be deleted and click the delete button when ready. You will be asked to confirm the deletion for the total number of files selected.
Method 2
- Move the mouse over the more button denoted by the "...". This button will reveal three additional buttons.
- Click on the red delete button (shown as a trash can).
- Confirm the deletion in the following prompt.
caution
All deletions performed are final, therefore always ensure that you have selected the correct files for deletion before confirmation.
Viewing Contents of a File
The ePortal allows users to view all documents associated with a draft within the portal. To view a document click on the row and the document will load within a popup window. Users may also navigate to the more button "..." and click on the eye icon to preview the document.
Applying/Changing the Description
Sometimes you have to add a description about a file to ensure that the planning officer, understands what the file may contain. This may be necessary if the filename may be too oblique. To add a description:
- Navigate to the more button "...",
- Click on the pencil icon to change the description.
- Type the desired content in the File Description box.
- Click the Save button to save the changes.
What's Next?
After uploading all necessary files, you may now submit the file to be vetted by a planning officer.